
Cheap DIY Display Case
For collectables and such
The worst part about collecting stuff is having to either dust it, or keep it buried away in a box somewhere. Store bought display cases are really expensive, and that's if you can even find one sized the way you want. But here's how you can make one for about $10 worth of supplies.
Contents
- Materials and Supplies
- Instructions
- Advice and Tips
Materials and Supplies
There isn't a "right" way to make a display case. This is just how I do it, so be free to adapt this to your liking. That said, this is what I use:
- (2) sheets of foam board (20x30in.) - Doesn't have to be expensive. I pay less than a dollar a piece.
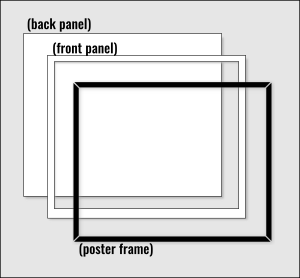
- (1) poster frame (16x20in) - This needs to be a cheap, lightweight frame. It needs to be the type where the sides "clip" on.
- Craft glue and super glue - This needs it's own section. See advice at the end.
- Hobby knife and cutting surface - Cutting this stuff will dull your blades. Don't be afraid to change them!
- Metal ruler - Never cut with a plastic or wood ruler. You'll gouge it eventually.
- Pencil
- Sticky Notes (optional)
Instructions
(1.)The front and back.
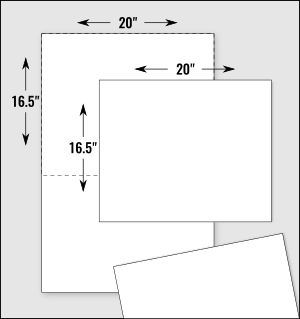
Cut two panels from the foam board. (20 x 16.5" each) These will be the front and back panels.
I like to make my display slightly taller than my frame. (16.5" instead of 16") I think the extra at the bottom makes it more sturdy.
Chose the best looking long edge for the bottom front of your case. Preferably an edge you didn't cut. The factory machines will usually cut straighter than you can. Most edges won't show that much, but this one will.
(2.) Make the window.
This will depend on the width of your frame's side pieces, but I used about 0.75" from the top and sides. The bottom is a bit more to allow for the extra half inch from step one. You want the window to be a little smaller than the frame's opening, though the bottom can be very close.
This front window panel will be delicate until the case is finished! Set it out of the way when you're not using it.
(3.) Decisions.
You'll need to decide on the depth of the case and the number of shelves. I make mine about 3.5" deep, so I'll be using that measurement going forward.
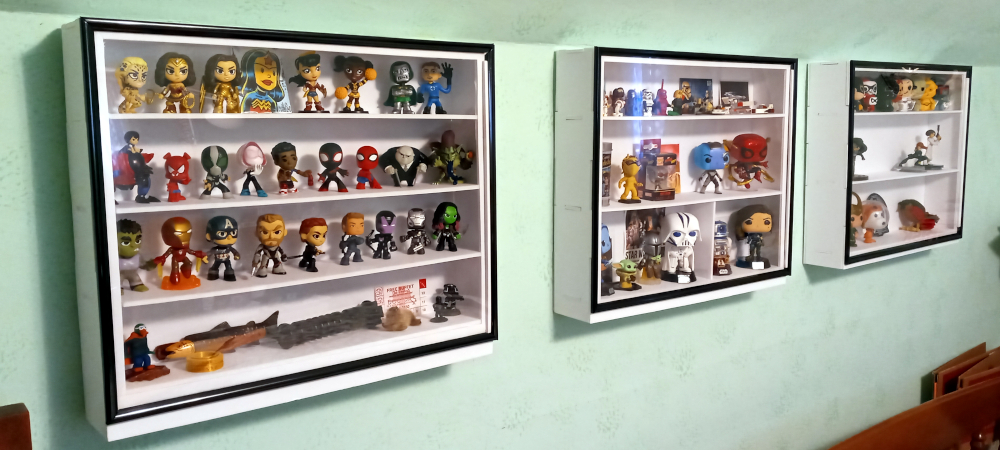
I have made four-shelf and three-shelf cases. This is where it helps if you have an idea what you want to display. The four short shelf case works well for Funko Mystery Minis, Lego Minifigs, etc. The three shelf cases have room for larger items on the lower two shelves, like full-sized unboxed Funko Pops. Customize based on what you want to display.
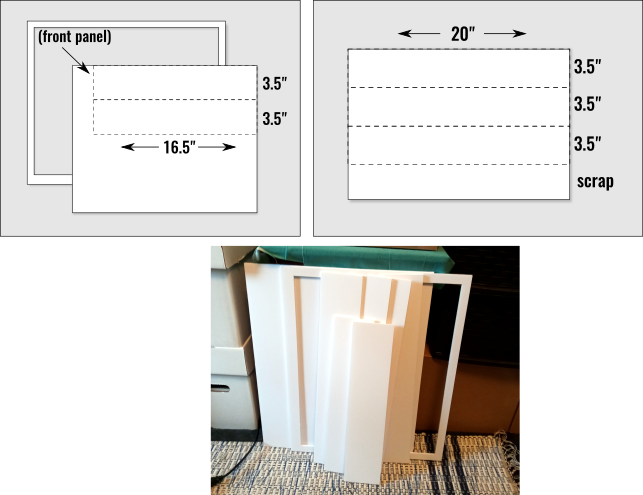
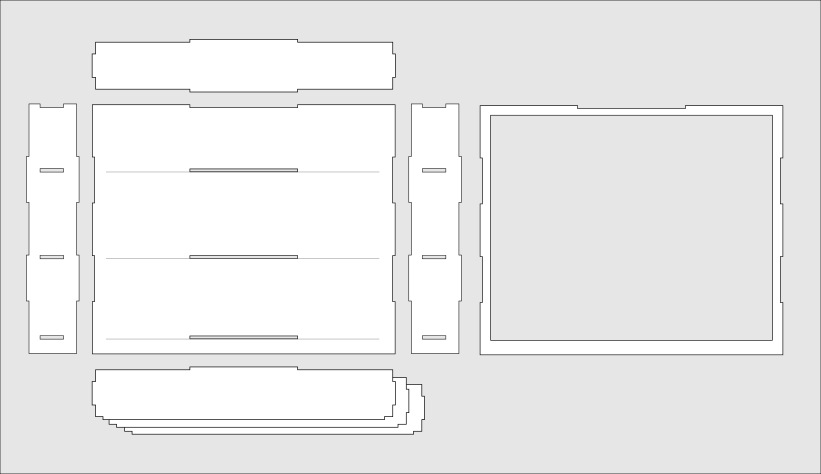
(4.) The Sides and Shelves.
Take the center you cut out of the front panel in step two. Cut two panels. (3.5x16.5" each)
The sides will come from the extra boards left from step one. Be sure you don't use the back panel by accident! You'll need one 20x3.5" board for each shelf, plus one for the top. These are the same depth as the sides, so you can use them to help measure.
Congratulations! You now have all your pieces. Now things get interesting.
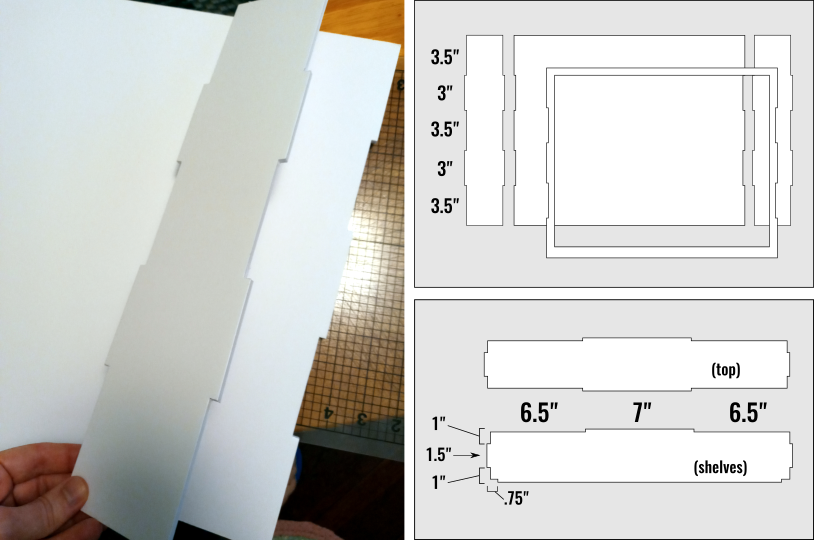
(5.) Buenas Notches
It's time to start cutting the notches. All the notches should be the same as the thickness of your board. So if your boards are an eighth of an inch thick, the notches should be an eighth of an inch deep. Again, you can use your board to measure.
Draw out your notches on one side panel and mark the section to be removed with an "x". It's super easy to cut the wrong sections out if you don"t mark them. Trace the second side panel and cut it, then use the sides to trace notches on the front and back panels.
(I suggest doing dry fittings as you go along to make sure everything is fitting ok. It will become more and more solid as you add pieces.)
Now cut the shelves according to the diagram.
(6.) Mark the Shelves.
Here's where you'll need to have decided on shelf heights. Place your front panel on your back panel and mark the bottom of the window on the back panel. This will be the bottom of your bottom shelf. Now mark out the rest of your shelves.
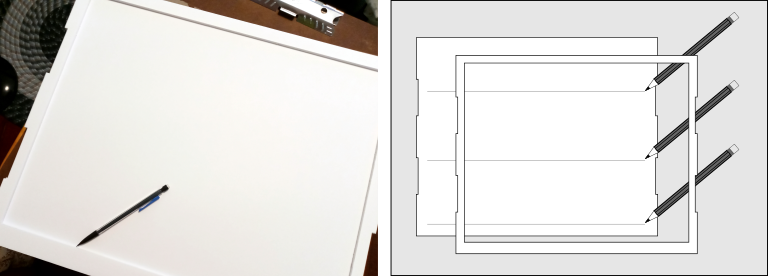
(7.) Holey Foam Board, Craftman!
(I am apparently getting progressively loopy as I type this.)
Hole cuts are the trickiest, but I have some tips below. Use the boards you've cut to measure and trace the holes on sides and back. Also add notches for the top panel.
(8.) Dry Fitting
Do a final dry fitting to make sure it all goes together alright. Sticky Notes are a handy way to mark what piece goes where. Slight variation in your cuts means some panels just fit better certain ways.
(9.) Glue
Fairly straight forward here. Put glue where you want things to stick. See Advice for which glue to use.
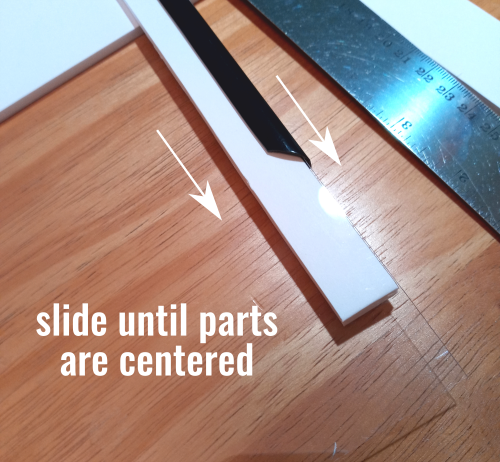
(10.) Front Glass
(I know it's not actually glass, but it's easier than saying "clear plastic sheet" over and over.)
Super glue three of the poster frame's side pieces to the front of your display. I have my displays open from the right, so that side stays unglued. Don't put the sides too close together. The glass shouldn't be a tight fit. Try to keep the sides even.
Cut a thin strip of foam board and use it to wedge the glass into the remaining frame piece. This assembled front glass should slide into place, and the foam wedge should keep it fairly secure.
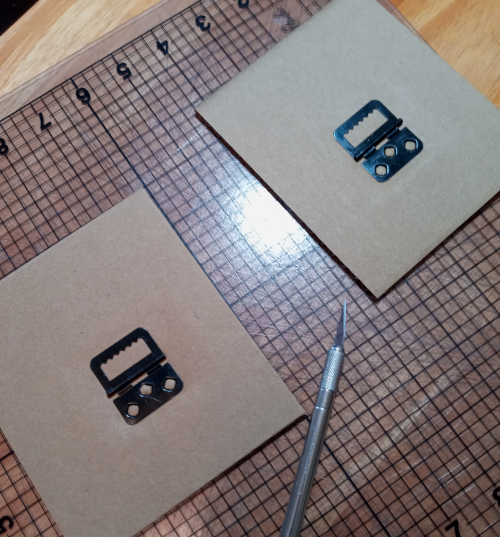
(11.) Wall Hangers
There should be a couple wall hangers on the backing board that came with your poster frame. Cut those bad boys out and glue them to the back of you display. Glue this really well! The entire case hangs on these. I use my best glue and put books on this to press it while it sets.
You can also slap a piece of scrap board on the lower back of the case, if you're feeling crazy. It helps the display hang a bit straighter.
(12.) Patience
Let the box sit.
No, really.
Don't throw it right on the wall and start loading it down. Make sure the glue is good and cured. You don't want it collapsing with your stuff inside, or worse, have super glue curing fumes leave residue on them. I'd wait at least 24 hours to be safe.
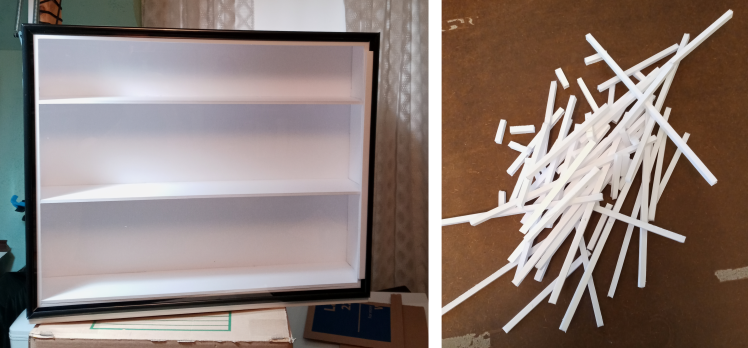
(13.) Party On Down
Congratulations! You now have your very own custom display case, a pile of foam board bits, and a silent resolution to not do this again any time soon. Fair warning though, that resolution fades faster than you might think.
Advice and Tips
Adapting
Part of the reason to make stuff yourself is being able to adapt to what you have available and what works for you. You might want to make this smaller or use different materials. That's great. I wouldn't recommend making this much larger or thicker though, unless you only intend to only display very light items. A larger case could also work if you don't hang it up. I haven't tried a larger case, so this is just my intuition.
Measuring
Marking out straight, long lines for cuts isn't super easy. Mark three dots at the proper distance, then connect them with a long ruler. Using more than two marks helps keep the line straight. A t-square helps a lot, but even that isn't fool proof. Even machine cut boards aren't always true right angles. Take your time, and keep in mind that small errors become less obvious when it's put together. After you've cut the first panel, use that to measure the second. When you can, carefully trace pieces you've already cut instead of using a ruler.
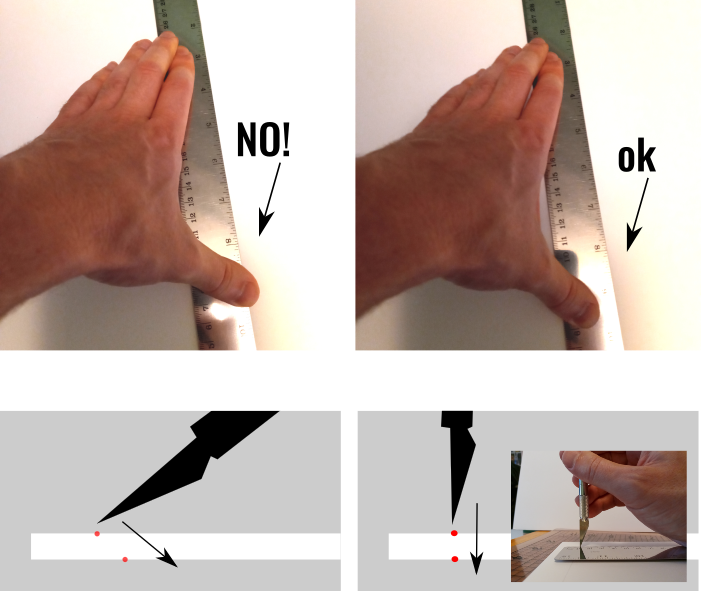
Using a Hobby Knife
Watch your fingers! Be sure they are not in the path of the blade before you start cutting.
Hobby knives have a tendency to cut diagonally. You can mark the back of the board by pushing the blade straight down, then finishing the cut from the other side. (See diagram)
Glue
My first two cases, I used Helmar Professional Acid Free Glue, which I love dearly. It sets really fast, it's strong, it's flexible, and it doesn't yellow. It's also Australian and nigh impossible to find since the pandemic. For the third case, I mostly substituted Elmer's Craftbond Quick Dry Glue. It worked, but it wasn't nearly as good to work with.
For the super glue parts, just get a good brand and don't use too much. Too much excess glue can cause white residue on the frame. Smeared glue can also stain the paper, so be careful. Super glue isn't supposed to work with foam, but the papered surfaces of the board will work.